Entra OAuth
This article will detail how you can use Entra OAuth with your Sharetru account.
You will need two browser windows/tabs for these steps.
Create the Identity Service at Sharetru
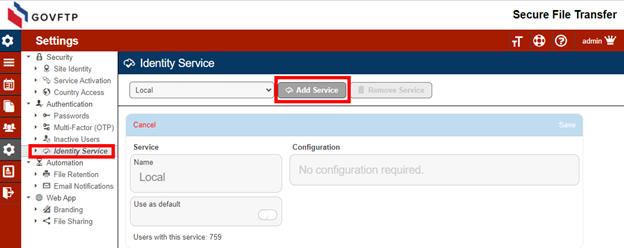
Log into your Sharetru Site. Navigate to Settings > Authentication > Identity Service. Click on Add Service.
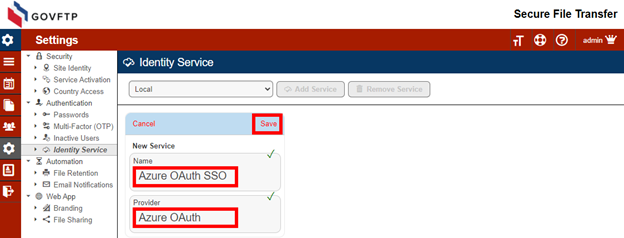
Enter a name for the New Service and select “Entra OAuth” as the provider and Save.
Create the Application at Azure
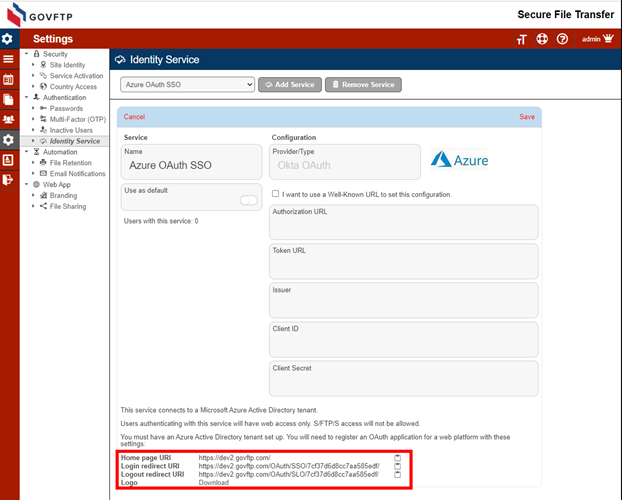
On your Sharetru Site, locate the IdP configuration information.
Log into your Entra AD site. Navigate to Applications and select App Registrations.
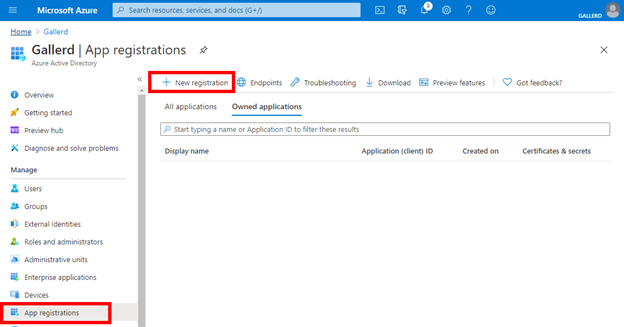
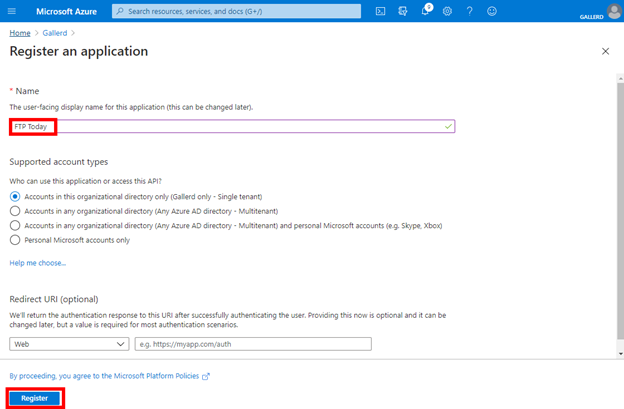
Enter a name for the application, leave the remaining values at default and Register.
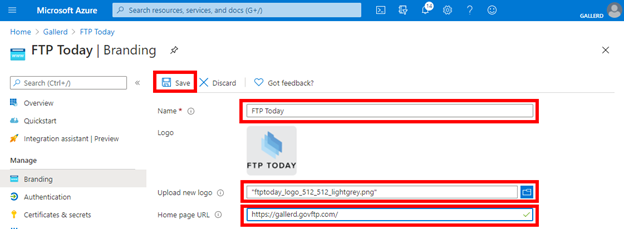
Download the logo from your Sharetru Site. On your Azure AD site, select Branding and upload the logo. Copy the Home page URL from your Sharetru site to the Azure AD site and Save.
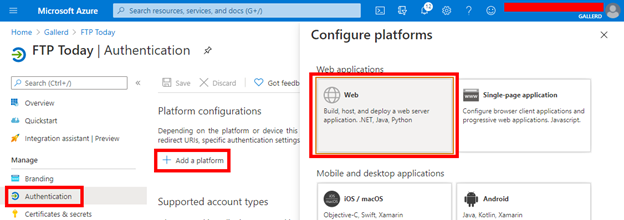
Select Authentication, Add a platform and then Web.
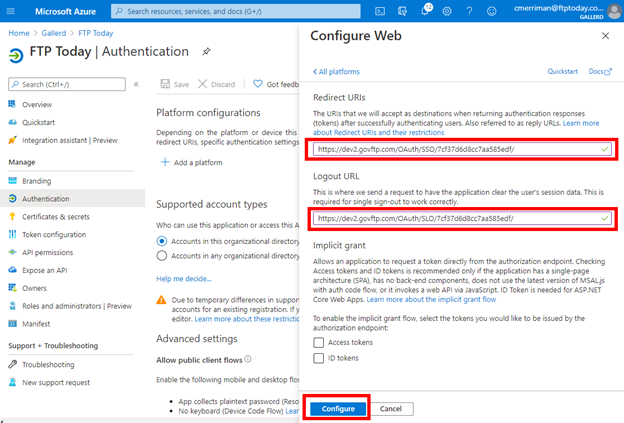
Copy the Redirect URI and the Logout URL from your Sharetru site to Entra AD and Configure.
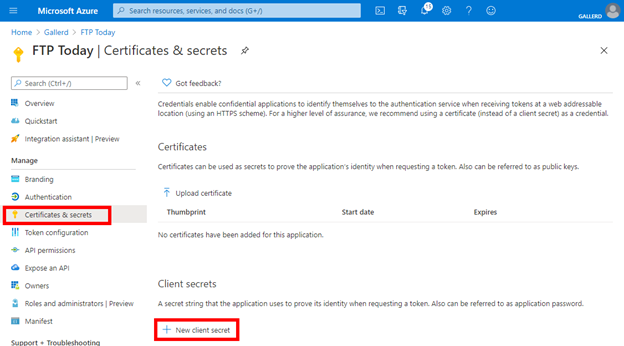
Select Certificates & secrets and New client secret.
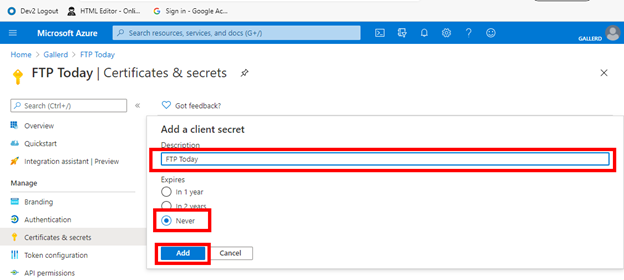
Enter a name, select Never and Add.
Configure the Identity Service at Sharetru
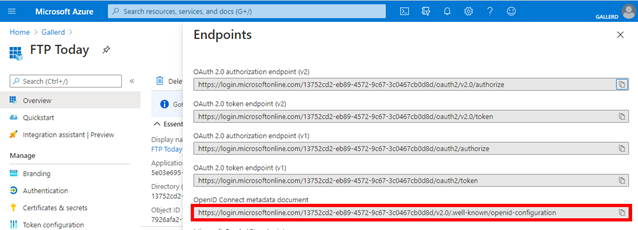
On your Entra AD site, select Overview and locate the Client ID, then select Endpoints.

Locate the OpenID Connect metadata document.
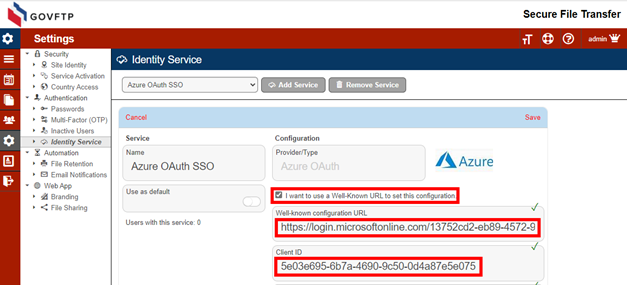
On your Sharetru Site, select “I want to use a Well-Known URL to set this configuration”. Copy the URL from the Entra AD site to the Well-known configuration URL field. Copy the Client ID from the Entra AD site to the Client ID field.
On your Entra AD site select Certificates & secrets. Locate the Client Secret. (If the value is not visible, you will need to delete and recreate the secret.)
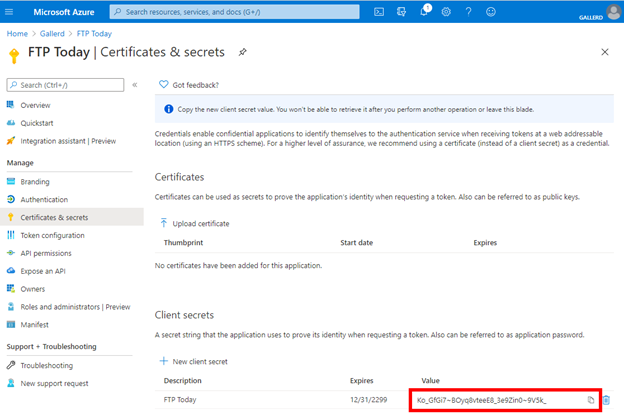
Copy the Client secret to your Sharetru Site and Save.
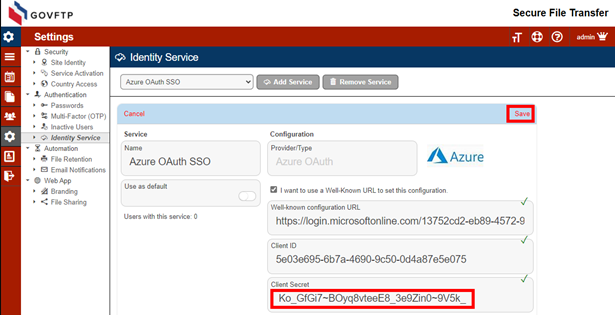
Assign the user to the application at Azure AD
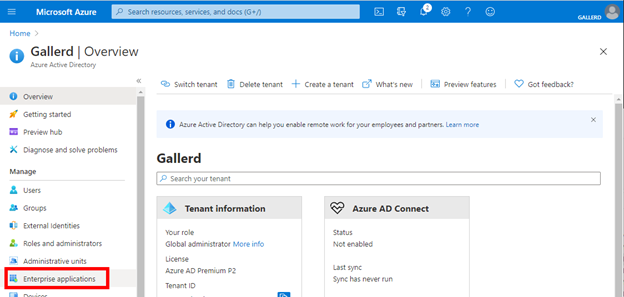
In Entra AD, navigate to Enterprise Applications.
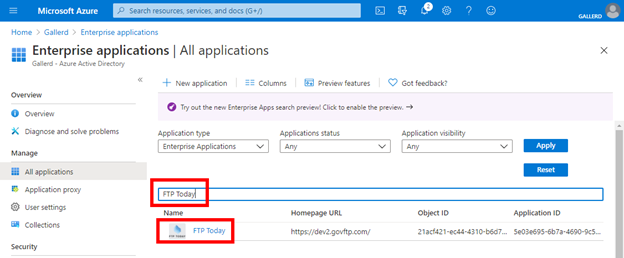
Locate and select the application you created.
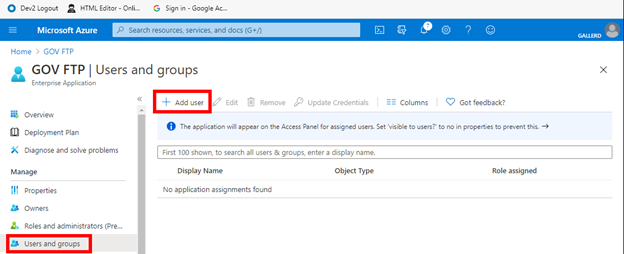
Select Users and groups and Add user.
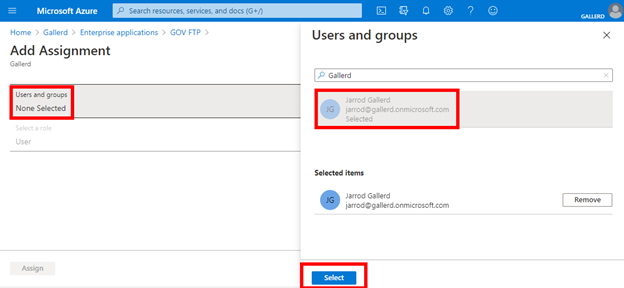
Select Users and groups and then select the user to assign, then Select.
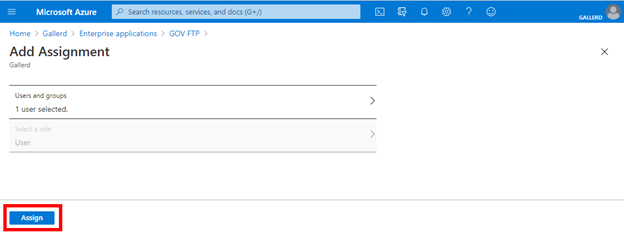
Select Assign.
Add the user at Sharetru
In your Sharetru site, navigate to the Users area and select Add User.
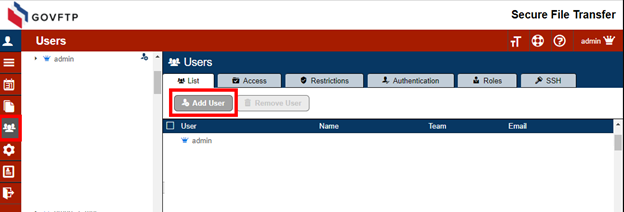
Enter the Entra AD primary name as the user name in your Sharetru Site. Complete the rest of the fields as needed and Save.
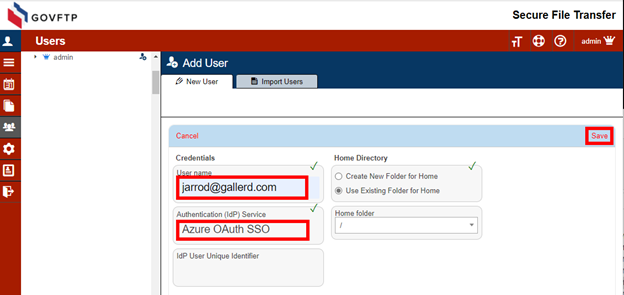
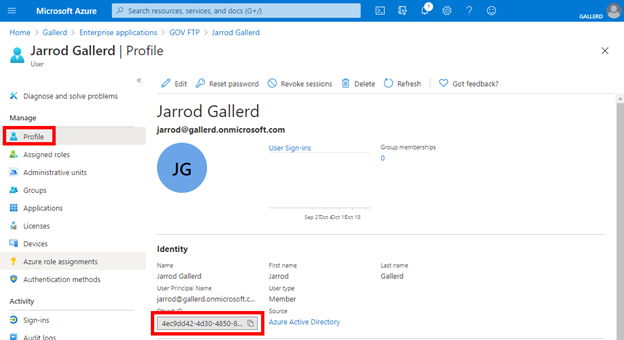
Entra AD supports an advanced security feature that offers further user verification. You may register the user with a unique identifier from Entra AD. In addition to matching the User Name to identify the user, we will match the Azure AD Object ID for that user.
When setting up the user, navigate to the user at Entra AD, select Profile and locate the Object ID. Copy that value.
Include that value as the IdP User Unique Identifier when you create the user.
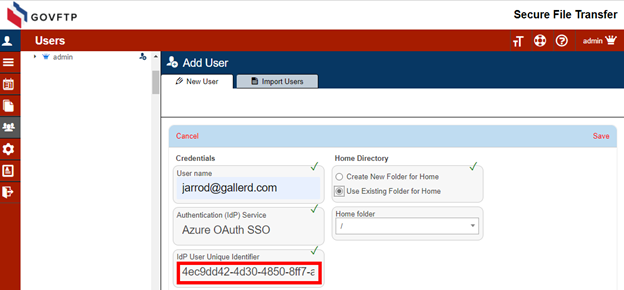
If the user already exists in your Sharetru site, you may change these settings on the Authentication tab for the user.
User access through FTP Today
Navigate to the site and enter the username and click Next.
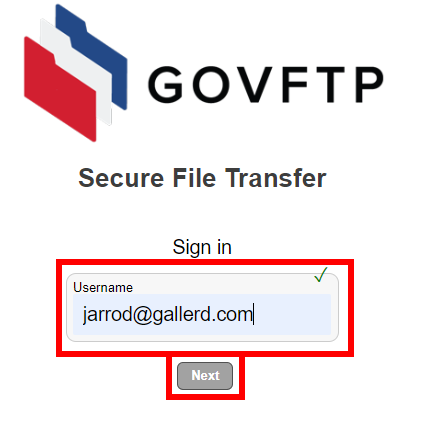
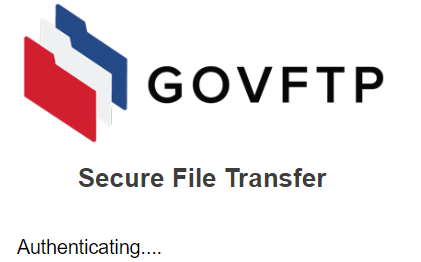
There will be a brief “Authenticating” message.
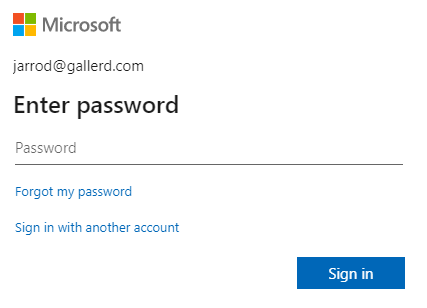
If the user does not have an open session with Microsoft, they will have to authenticate.
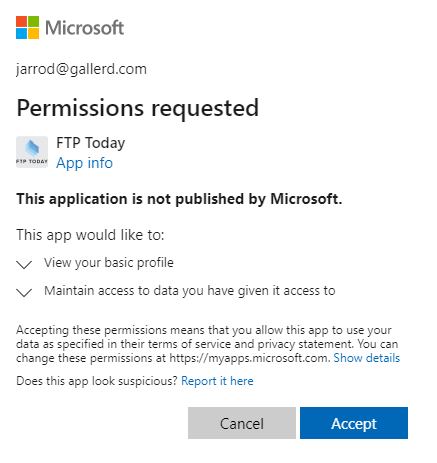
The user may be asked to approve the application.
The user will now be logged into your Sharetru Site.
User access at Entra AD.
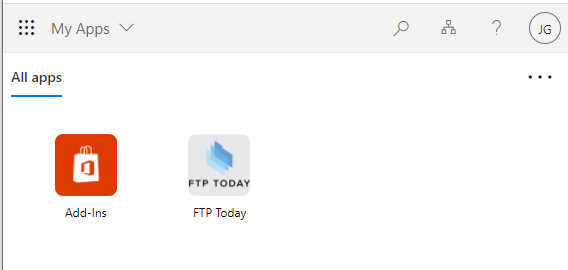
Access the Microsoft My Applications portal. On the home screen, the user can click on the Sharetru application.
Ending the session
When done, the user may log out of the Sharetru site or allow the session to expire. This will not log the user out of Entra AD or any other services authenticated through Entra AD.
The user may also log out of Entra AD which will log the user out of your Sharetru Site. This will not close the browser window, but any action taken in the browser window will fail. After a short period, the browser window will reload to the login page.
The session timeout on the Sharetru Site may log the user out of the site even if they are still logged in at Entra. In that case, after reentering their username they will be immediately authenticated to the site.
%20Logos%202022/sharetru%20logo%20white%20bg%20and%20padding.png.png?width=300&height=75&name=sharetru%20logo%20white%20bg%20and%20padding.png.png)